Studio Blog

My Week in Birds ~ June 2026 Week 4
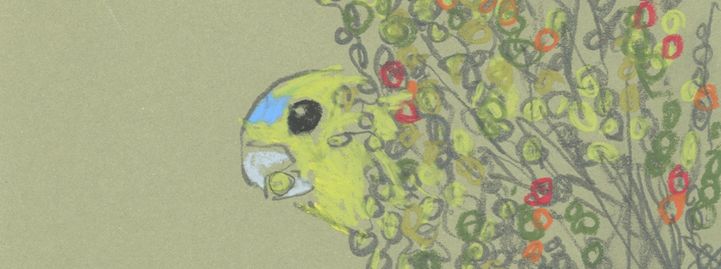
The wood ducks have returned to my little town. They seem to hang out here in the winter months, at least I have images of them in my memory every year sitting in the branches of The Big Tree with the misty morning surrounding them, calling their comforting, but still slightly otherworldy wails. Did you know that my friend Sarah hand prints all of my wooden bird mobiles? I carve the lino plates and she prints them using a roller and a little printing press. Each colour a new layer. Initially I printed them myself but it took up all my time (and space) meaning I was able to do very littl else. Sarah has been printing for me for about 8 years now and she’s still not bored of it! She has just finished a batch of Welcome Swallows which haven’t been in stock for quite a while, so it’s good to see them back. I’ll let you into a little secret about this design. I accidentally made one of the wings ever so slightly smaller than the other. I was annoyed with myself initially but then I realised it meant the bird hangs at an angle which looks like it is swooping and soaring and playing in the air like real swallows do. A whole flock would look lovely all together! There are weird signs of spring everywhere yet it is only the start of winter. The jonquils have popped their yellow heads out already in my garden and the golden wattle is a month or so early round here. Musk lorikeets have arrived in flocks too, I don’t think I’ve seen them here at this time of year before. They are joining a host of bees in feeding on what appears to be the flowers of what I think are the tall ash trees lining our town’s oval (I really must get better at tree identification.) It has been a very mild start to winter in central Victoria, but it’s bringing the stubby little musk lorikeets so it’s not all doom and gloom! I found an old SD card for my camera the other day, popped it into my computer to see what was on it and Oh Joy! tonnes of phtoos I took about 5 years ago of yellow robins! So I’ve been drawing away with my oil pastels (my new favourite medium) and I also decided to make a drypoint etching of this glorious bird! So keep an eye out as I’ll soon be making the drawings and the etching available in the ol’ online shop. (I’ll probably announce it all next friday!)Happy Bird Noticing!
Learn more
My Week in Birds ~ June 2026 Week 3
It’s the week before the last week of school term 2, and yet I feel I’m only just settling into this year’s new routines. I’m trying to walk everyday with my reluctant little dog, Viktor, and my neighbour’s oversized old gentleman, Smooch, the Hungarian vizsla. I include him on our walks because he’s such a glorious orange colour and often goes very well with my outfits. My wardrobe is very Autumnal. I spotted a grey shrikethrush through my dirty studio window this week. I’ve been hearing them again lately. Their call is so evocative and pulls me back to somewhere that I haven’t quite figured out. It might be the memory of my two years in the bush, in a place called Basalt, outside of Daylesford, where my husband and I lived just after we got married. It was my first experience of being in the Australian bush and the noises and smells were so different to my experience of Australia (mostly just Melbourne) up to that point and a stark contrast to the two years spent back in Northern Ireland before our wedding. For me, the shrikethrush sings the song of adventure and new places. Perhaps they heralded me choosing a life in Australia. Maybe their song signalled the start of what my art practice has now become: my love of this area and how I’m always trying to recreate the sense of it in my work. I included the grey shrikethrush in my book The Bush Birds. The photo that inspired the illustration was of a visitor to our garden during the lockdowns of 2021, who nested under the eaves of our house, although I never quite figured out where! She was a very welcome lodger during those unusual times. A big thank you to everyone who replied to last week’s email telling me of some good double-barred finch hangouts. I now have an adventure planned with my friend Jane for September. However we’re claiming to be searching for DIAMOND FIRETAILS because we never find our target bird on our trips and I really want to see the double-barred delights!
Learn more
My Week in Birds - June 2026, week 2
My Week In Birds Another week deeper into brooding skies, temperamental weather and warming fires. The garden is winding down and needs my attention to tuck it in before it falls asleep properly. (This weekend’s diary is once again full, hopefully next weekend then!) New Holland Honeyeaters I’ve been sitting in my studio this week, at my cluttered desk, the heater on, and out of the corner of my eye, being distracted by a little flock of new holland honeyeaters tucking into the remnants of fruit still clinging to our quince tree. The tree’s leaves are autumnal yellow, the overgrown fruit is ripened yellow, and the striking black and white birds complement the scene with their dash of bright yellow down their wings. In the branches of the tree, there is also an imposter quince; a totem tennis ball dangling from its string. The kids must have thrown it up there last summer, but it is only being revealed now that the foliage is less dense. It has the same fuzzy skin as the quinces, albeit a shade or two more vivid in colour. Double-barred Finches I’m still trying to draw daily. This week’s new favourite birds to draw are these little double-barred finches, also known as owl finches. I’ve never seen them in real life (I’m drawing from video footage I’ve found online), but I think they are definitely going to be a destination bird for me - as in I’m going to go find them in the wild one day. Are any living near you? Can I come and visit?! All tips and hints as to the best locations welcome! Sulpher-crested Cockatoo So, we’re not yet halfway through the year (close, but not quite) and I’m designing this year’s Christmas card already, crazy, I know! I’m doing it good and early because I’m away on my writer’s fellowship for all of August, and that’s when we normally finalise Christmas designs. My amazing business manager, Chris, has told me I’m not allowed to go away until this job is done, so I thought I’d better get to it. This year will be the sulphur-crested cockatoo in a wreath of bottlebrush. It will join last year’s kookaburra and the magpie from the year before. The photo above is my mock-up of what it’ll look like. I’m currently making the drypoint plate and will print the original image next week.Happy Bird Noticing!
Learn more
My Week in Birds - June 2026, week 1
Has it been raining where you are?Everyone is going around my town saying ‘what awful weather!’ but I quite like this wet, drizzly dullness. It’s changing the colours of the bush, making me see it with new eyes. The blue greys are more silvery, the greens more vibrant. And I love feeling all cosy inside my studio or next to the wood-burning stove in the kitchen. I’m definitely a winter girl!I’ve decided to try and send a short, blog-type mailout once a week entitled My Week In Birds. It’ll cover in just a few words (and most likely a picture) the birds influencing me each week, what I’ve been making and any newness about to happen.Dip in when you feel like it for a 3-minute read over a cup of tea! The Pink Eared Ducks Last weekend, I headed off to Baldessin Studio in St Andrews (in the bush on the other side of Melbourne) to learn plate lithography with artist Chris Ingham. It’s such a magical and mysterious process, which I think I’ve now just about grasped the concept of, it’s a tricky one to get your head around!My muses were these pink-eared ducks that I met in Werribee a few months ago. They have such gorgeous facial markings, and that flash of pink is just stunning!You can see my video of the weekend and the lithography process over on my instagram. The King Parrots While I was in St Andrews I spotted a pair of king parrots acrobatically ambling along the fine branches of a gum tree. It was World Parrot Day last Sunday (31st May) so I took a few photos and drew them for a post to acknowledge these wonderful birds and create awareness for parrots worldwide! The Superb Fairywren A new mini etching finally (it’s been a while!) I have a long running series called "Female Of The Species" where I entitle the piece without saying it’s the female. Everyone recognises the bold coloured males, which the species are often named after, but the little brown females are much harder to recognise and remember. Happy bird noticing!
Learn more
Making Muddles!
Hello bird lovers, It’s winter here in central Victoria, and this week the sky has been full of black cockatoos - those long, gentle calls as they pass overhead. I always stop and look up. No matter how many times I see them, they still feel a bit magical. What We're Changing We’re renovating the “office” part of the studio at the moment - which basically means we’re living in creative chaos! Initially this room was built as a storeroom, but now Chris (my business manager) has suggested it be made into more of an office which is a great idea. A couple of days ago our lovely local builder installed a new window, and oh, the light! It’s already making such a difference. The sun pours in (when it finds a gap in the clouds) and lands right across my desk… and for a moment, you forget about the tools, boxes and trailing extension cords everywhere else. I’ve attached a photo so you can enjoy a little of the glow too, just excuse the mess! What I Made There are seven new etchings now on the website, each one a bird I saw recently while in Royal Park in Melbourne a month ago. They're in small editions (only a few of each), so if one catches your eye, don’t wait too long - they might not hang around! Here are two of them, go to the website to look at the rest! Browse the Etchings Oh, and I’ve also added two new stickers to my collection; they make a cute little extra in a card, and made great laptop decorations or scrapbooking embellishments! Grab a Sticker What We Mucked Up (My Business Manager, Chris, titled this section, but I want to be honest, really it should be what "I" mucked up!) After a long wait, enamel pins have finally arrived at our warehouse (hooray!) - but when our packer opened the boxes, they discovered the barcodes on the backing boards didn’t match the pins attached. Whoops! Turns out when I put the form in I didn't format it properly and it got jumbled and now I have thousands of pins with the wrong barcodes, making a big headache for my packers and delaying my much needed restock. It’s one of those things that’s so easy to do, especially with so many steps and people involved in getting a product from idea to shelf. As fantastic as it is having help, sometimes it still feels like I'm learning as I go. We’re getting it sorted now, and the pins should be online in a few days. So keep an eye out if you have been waiting! More pins being restocked soon! Honestly, I can't be the only one who gets my pdfs, my csvs and my xls mixed up, can I? Chris has banned me from filling in the forms now, (was this my plan all along?!!)Warm winter wishes-Bridget
Learn more
I never planned on becoming a printmaker.
The first time I tried printmaking, I didn’t like it!
Learn more
Creating the Red Wattlebird Etching - Part 5 - Inking Up The Plate In Multiple Colours And Editioning
This is the plate finally finished so now I'm going to ink it up and edition it. Remember that each time I ink up the plate it'll only give me one print. The inking up process has to be repeated for each print in the edition. To see the process of making the plate please see my previous blog posts. I have all my inks mixed up and ready on the glass top table. I start by applying the ink onto the surface of the plate. The ink is a water soluble oil based printmaking ink. I use Caligo Safe Wash. I apply it with a rubber tool called a kidney, it's actually a ceramics tool but works very well for ink application. I then rub the ink into all the lines using a loosely woven cloth called tarlatan, rubbing in small circles, then gradually I wipe off the excess ink, leaving the ink just in the lines. It's good seeing the image emerge from the inky darkness! I then add other colours straight onto the plate. This process is called a la poupee or dolly printing. It is an alternative to making multiple plates and inking each in a different colour to be printed on top of each other. A la poupee technique is a faster process, but sometimes the colours don't come out as vivid as a multi plate etching due to each added colour retaining a bit of the residue of the initial inked up colour. But I find it works well for my bird etchings. Below I add the yellow of the belly, I blend it into the brown underneath. I then add a little black ink to the tarlatan (or in this case I'm using cheescloth.) Just a smidge of ink, not too much. ...and gently blend it into the wing area.... ... and on the eye. Then using an (ECO FRIENDLY!) cotton bud I apply red ink to the red wattles. I gently blend the red ink in with the cheesecloth, then with the clean end of the cotton bud I wipe away all the ink in the areas I want really white. ...including the striated markings on the breast and belly... ...and on the end of the tail feathers. Finally, to give the bird that little glint in the eye, I use a sharpened stick (for maximum accuracy) and wipe the glint clean of ink. Now it's time to get the cotton rag paper out of the water bath. It's been soaking for anywhere from 5-10 mins to a couple of days (yes I forget that I've got paper in the bath sometimes.) The wet paper gets blotted between newsprint paper so it is only damp with no glistening water on its surface. and it gets brought over to the press bed. For these larger prints I like to put the paper in place first then move the press bed a little trapping the edge of the paper under the roller. This ensures the paper stays in place while I lift it up and place the inked up plate in the correct position. The plate and the paper then get the press blankets laid on top and everything it rolled through the roller. The roller is adjusted so it is very tight and the paper and plate are put under a lot of pressure as they are rolled through. Then the exciting part! As you lift the paper you see that the ink has been transfered from the plate onto the paper. You can even see where the damp paper has embossed around the plate. And then the whole process is done all over again and again and again, in this case 16 times (actually 17 because the artist is allowed to keep one as an AP - Artist Print) All the prints then go into drying boards with weights on top so the paper dries nice and flat. They stay in the boards for about 4 days. I then number the prints, title them and sign them and make them available for sale!
Learn more
Creating The Red Wattlebird Etching - Part 4 - Working More Into The Plate and 2nd Proof
Using the first proof (see previous blog post) as a reference I can now see where the plate needs more work done to it. I use a drypoint etching needle to make more scratched lines in the plate. In some areas I use a folded up piece of sandpaper to create lines. I rip off a small square... and fold it over a few times. The folding gives a nice edge with which to draw. I inked the plate up for its 2nd proofing and printed it. This time I inked it up in sepia browns and added extra colours to the plate (I will show this inking up process in my next blog post.) You can see in the image below the progression of the plate. The difference between the 1st and 2nd proof. I can still see areas I need to work more into the image, but I'm really enjoying the mark making process in this piece. Below is a close up of the how the different marks appear when printed. The fat white streaks are where the PVA glue protected the plate from the spitbite acid. The thinner white streaks on the right hand side are burnisher marks made in the acid bitten areas. The fainter lines within the yellow area are made with the folded sandpaper I will keep working more into this plate and in my next blog post I will show how I ink it up in multiple colours and print it as part of an edition.
Learn more
Creating the Red Wattlebird Etching - Part 3 - Proofing The Plate
Proofing the plate, first glimpse.
Learn more